Essential Guide: Potential Hidden Costs of Rooftop Decks
Building a rooftop deck transforms underused roof space into valuable outdoor living, but many homeowners underestimate the hidden costs that make these projects complex and costly. This article explains what a rooftop deck is, why unexpected expenses often arise during rooftop deck construction, and how South Shore Massachusetts conditions — from local codes to seasonal snow loads — change cost profiles. Early in the planning stage, a trusted local contractor can clarify permit requirements, structural needs, waterproofing options, and realistic budgets; AHB Construction LLC, based in Middleborough, MA, offers free consultations and manages permits, inspections, and material sourcing to help homeowners avoid surprises. You will learn a detailed cost breakdown, the permit process for towns like Middleborough and Plymouth, structural and waterproofing requirements, material choices that affect long-term value, and seasonal maintenance that preserves the investment. Understanding these elements up front reduces the chance of mid-project change orders, accelerates approvals, and helps you choose solutions that balance safety, durability, and return on investment.
Effective project management is crucial for mitigating these risks, as highlighted by studies on construction project success.
Managing Construction Project Risks and Costs
The objectives of this critical analysis were to identify key strategies to manage effectively and efficiently future construction projects while paying particular attention to the measures of project success of time, cost, quality, and customer satisfaction. The Anglo-Saxon laws, from where Zimbabwe's laws are derived from, were used as a basis for this analysis.
Construction Systems for Detached, Single-story Concrete Block Houses in Florida: Current Practices, Costs and Potential Innovations, 1973
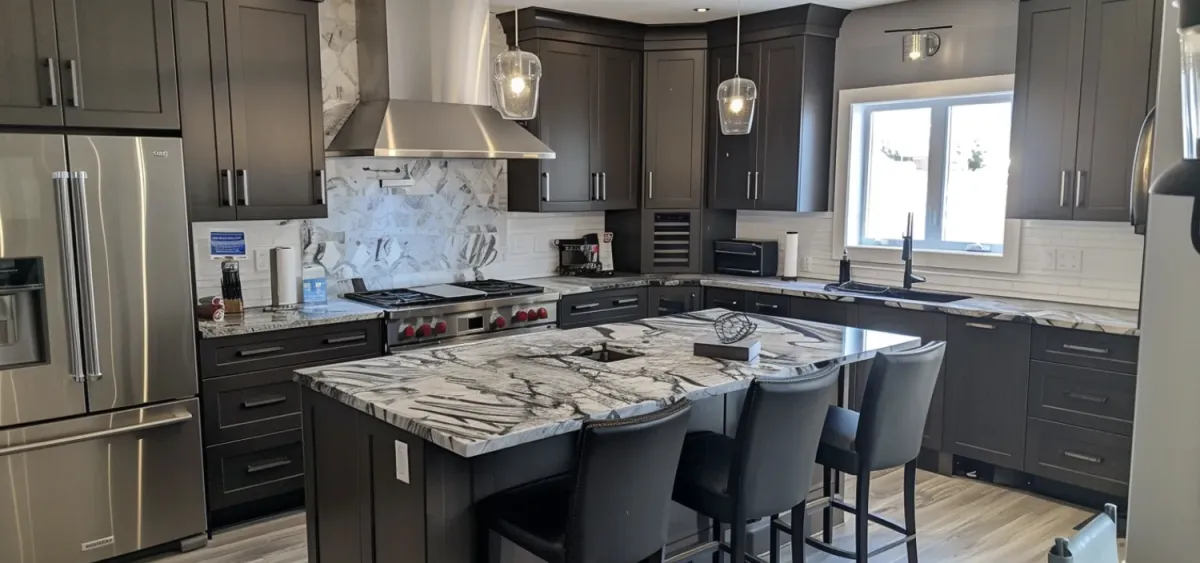
What Are the True Costs of Building a Rooftop Deck in Massachusetts?
A rooftop deck’s true cost includes visible line items — materials and labor — plus less-visible drivers: structural reinforcement, waterproofing, permits, engineering, access logistics, and contingencies for roof repairs or weather delays. The mechanism that pushes costs beyond basic decking is project complexity: adding load-bearing structure, ensuring watertight assemblies, and complying with Massachusetts building codes usually requires specialized trades and inspections. Homeowners should plan for a per-square-foot baseline plus add-ons for reinforcement and waterproofing that can double certain line items depending on roof condition. Below is a practical list of primary cost categories to guide early budgeting and spotlight where hidden fees commonly appear, followed by a short explanation of how transparent estimating reduces surprise charges.
This list outlines the main cost buckets homeowners must consider before committing to a rooftop deck project:
Materials and decking: includes decking boards, fasteners, railings, and drainage components.
Labor and specialty trades: carpentry, roofing, waterproofing installation, and railing installation.
Structural engineering and reinforcement: load calculations, stamped plans, and framing upgrades.
Permits, inspections, and fees: municipal application fees and required inspections.
Access, scaffolding, and protection: jobsite staging, temporary protection, and crane or hoist costs.
Contingency and repairs: unforeseen roof repair, water damage remediation, and weather delays.
Taken together, these categories show that materials and labor are only part of the picture; structural and compliance requirements frequently drive the largest unanticipated costs. To make those unknowns manageable, some homeowners work with local contractors who provide itemized estimates and end-to-end project management to limit escalation.
Further research into roof construction costs highlights the ongoing challenge of material availability and labor expenses, suggesting alternative approaches to traditional methods.
Roof Construction Costs: Materials, Labor, and Alternatives
When current costs and methods are examine, it is found that two systems, roof and exterior walls, have the greatest need for changes in the immediate future; and one system, thermal insulation, needs an empirical study. The roof is of materials which are in short supply and rapidly increasing in cost. The study concludes that, with present cost trends, metal frame members for the roof or a reinforced concrete slab roof are feasible alternatives. The exterior walls have excessive labor costs, and the feasible alternative may be cast-on-site masonry tilt-up panel walls.
Construction Systems for Detached, Single-story Concrete Block Houses in Florida: Current Practices, Costs and Potential Innovations, 1973
Introductory cost comparison table for rooftop deck budgets in South Shore conditions:
Cost CategoryTypical DriversEstimated Range (example)Basic decking & railingsMaterial choice, finishes$30–$100 per sq ftLabor & tradesComplexity, access, crew rates$20–$60 per sq ftStructural engineeringRoof condition, load upgrades$1,000–$8,000 totalWaterproofing & drainageMembrane type, flashings$8–$30 per sq ftPermits & inspectionsTown fees, plan reviews$200–$2,000 total
This table highlights that per-square-foot estimates vary widely with material and structural needs, and that one-time costs (engineering, permits) can be significant relative to per-sq-ft items. Understanding these drivers helps homeowners set realistic contingency budgets and compare contractor proposals more accurately.
Which Hidden Expenses Should Homeowners Expect Beyond Materials and Labor?
Hidden expenses typically appear when initial site assessments fail to capture roof condition, access complexity, or code-driven requirements. Structural engineering fees are often required when a permit triggers the need for stamped plans; those fees cover load calculations, design of reinforcements, and can add both time and cost to the project. Access-related charges — scaffolding, hoists, or temporary roof protection — become necessary when delivery or safe installation cannot proceed from ground level, and they often appear as separate line items. Additionally, contingency funds should be set aside for discovered rot, failed roofing layers beneath existing coverings, or code-required upgrades that were not apparent in a preliminary walkthrough.
Anticipating these expenses reduces change orders and helps projects stay within budget and timeline. A clear pre-construction inspection and documented condition report can prevent surprises, which naturally leads to the next critical decision: how structural reinforcement and waterproofing choices influence total cost and long-term performance.
How Do Structural Reinforcement and Waterproofing Impact Overall Costs?
Structural reinforcement and waterproofing are common, high-impact hidden cost drivers because they directly affect safety and the roof’s long-term integrity. Reinforcement approaches — ranging from sistering joists and adding blocking to installing new beams and posts tied to foundations — vary in invasiveness and cost; simple sistering may be relatively economical, whereas adding new beams or transferring loads to foundations is substantially costlier. Waterproofing scope is equally variable: a full membrane replacement with integrated drainage and flashings is more expensive up front but prevents leaks that lead to costly interior repairs. In many cases, skimping on waterproofing increases lifetime costs through repeated repairs, interior water damage, and compromised structural elements.
Choosing the right combination of reinforcement and waterproofing requires load calculations and an understanding of material lifespans, which transitions naturally into how permits and local regulations shape these technical decisions.
How Do Massachusetts Building Permits and Regulations Affect Rooftop Deck Construction?
Permitting in Massachusetts determines whether a rooftop deck can proceed as planned and dictates documentation, inspections, and compliance with state and local codes. The permit system functions to ensure safety: jurisdictions require plans, sometimes engineer-stamped drawings, and scheduled inspections at key milestones; these processes drive timelines and can add fees or required changes. Local differences across South Shore towns — such as specific review timelines or zone restrictions — influence how quickly a project advances and whether additional documentation, like detailed flashing plans or load calculations, will be requested. Below is a clear, stepwise summary of the typical permit process and timing to help homeowners plan and avoid avoidable delays.
Use this numbered timeline to anticipate administrative steps and expected intervals when applying for rooftop deck permits in South Shore municipalities:
Submit application and plans: homeowner or contractor files drawings and required documents with the building department.
Plan review: municipal building officials review for code compliance and may request revisions or engineer-stamped documentation.
Permit issuance: when plans meet requirements and fees are paid, the permit is issued and work may begin.
Inspections during construction: scheduled inspections verify framing, waterproofing, and final compliance.
Final approval: after passing all inspections, a final sign-off closes the permit.
These steps typically take weeks to months depending on complexity and local workload; engaging a contractor who manages submissions and coordinates reviews can shorten timelines and reduce the chance of resubmittal requests. AHB Construction LLC assists homeowners in Middleborough and neighboring towns by organizing permit packages, coordinating required inspections, and navigating local code nuances to keep projects moving.
What Is the Rooftop Deck Permit Process in South Shore Towns Like Middleborough and Plymouth?
In South Shore towns, the permit process commonly starts with a documented site plan and construction drawings that show structural details, guardrail heights, and waterproofing strategies; engineers may need to stamp drawings when load-bearing changes are proposed. Expect the municipal plan review to check compliance with accessibility and safety provisions, evaluate egress and railing specifications, and confirm that drainage and flashing details are adequate to prevent water intrusion. Typical timelines vary: initial review may take one to four weeks for straightforward applications and longer if engineering review or zoning variances are required. To speed approval, include complete documentation and engage a local contractor who understands town-specific filing practices and inspection scheduling.
Handing permit management to an experienced local firm reduces homeowner administrative burden and minimizes scheduling gaps between review and construction. Because proper permitting links directly to compliance and resale value, the permit phase also connects to structural engineering and waterproofing decisions discussed next.
Which State and Local Building Codes Must Rooftop Decks Comply With?
Rooftop decks must comply with Massachusetts building codes and local amendments addressing structural load, guardrail and stair safety, fire separation, and egress. Key code items typically enforced include minimum guardrail heights and baluster spacing to prevent falls, specified live loads and snow loads to ensure structural adequacy, and requirements for safe access and egress. Non-compliance can force redesigns, additional engineering, or removal of nonconforming elements, which increases costs and delays. In practice, zoning overlays, setback requirements, or HOA rules may further restrict deck size or placement and should be checked before final design.
Understanding these code elements up front reduces the likelihood of costly rework and informs how much engineering and reinforcement will be required, which is why many homeowners choose contractors familiar with Massachusetts and South Shore code enforcement.
What Structural Requirements Ensure Safety and Longevity for Rooftop Decks in South Shore MA?
Structural safety for rooftop decks rests on accurate load assessment, appropriate reinforcement, and connections that transfer forces safely to the building’s structure. Live load and snow load requirements ensure the deck supports typical occupancy and New England winter conditions; a qualified structural engineer quantifies these loads and prescribes reinforcements when existing framing cannot safely carry the increased loads. Common reinforcement solutions include sistering existing joists, adding new beams or headers, and installing posts or load paths tied to foundation elements. Proper detailing and inspection prevent long-term issues like sagging, fatigue, or failure under snow.
A careful structural assessment that leads to engineered, inspected reinforcements both protects occupants and preserves the homeowner’s investment. This engineering-driven approach is essential before selecting waterproofing systems and finishes, which the next section addresses.
Why Is a Structural Engineer Consultation Essential for Rooftop Deck Projects?
A structural engineer performs load calculations, examines existing framing, and produces stamped plans that ensure the deck and roof assembly meet code and safety standards. Their deliverables typically include calculations for live and snow loads, details for load transfer to existing structure or foundation, and specification of framing sizes and connections; these documents are often required during the permitting process. Engineers may identify hidden deficiencies — like undersized rafters, inadequate bearings, or deteriorated connections — and recommend targeted reinforcements that avoid unnecessary full replacements. Hiring an engineer early reduces the risk of costly mid-project changes and helps certify that the finished deck will be safe under South Shore weather conditions.
This professional input affects schedules and budgets but prevents under-engineered solutions that can lead to structural failure or expensive retrofits, which leads into how engineers and contractors determine load capacities.
How Are Roof Load Capacities and Reinforcements Determined?
Load capacity is determined by combining code-prescribed live load values, estimated snow loads for the region, and existing structural member capacities; calculations translate pounds per square foot (psf) requirements into specific joist, beam, and support sizes. Inspectors and engineers evaluate joist spacing, rafter depth, and bearing conditions to decide whether to sister joists, add beams, or create new load paths to foundations. Reinforcement choices balance invasiveness and cost: sistering joists is less disruptive but limited in capacity gains, while adding beams tied to new posts provides greater support but requires foundation connections. Understanding these trade-offs guides decisions that align structural safety with budget goals. Translating these design choices into durable, watertight assemblies is critical — which brings us to waterproofing options and their role in protecting rooftop deck investments.
Which Waterproofing Solutions Protect Your Rooftop Deck from Water Damage?
Waterproofing is the defensive layer that prevents moisture from entering the building envelope, and choosing the right system depends on roof slope, finish type, and expected foot traffic. Effective waterproofing combines a durable membrane, proper flashings, and positive drainage to remove standing water; installation quality is as important as membrane choice. The following comparison table summarizes common membrane types, lifespans, cost ranges, and suitability for flat roof decks, helping homeowners weigh upfront costs against long-term durability and maintenance demands.
Waterproofing SystemKey AttributeTypical LifespanRelative CostLiquid-applied membraneSeamless coverage, conforms to details8–20 yearsModerateSheet membrane (EPDM)Durable rubber sheet, few seams20+ yearsModerate–HighPVC membraneHeat-welded seams, UV resistant20+ yearsHighHybrid systemsCombination of sheet + liquid flashings15–25 yearsModerate–High
This table clarifies that systems with welded seams (PVC) and properly detailed sheet membranes tend to offer longer lifespans at higher initial cost, while liquid-applied options provide seamless protection in complex details but may need more frequent maintenance.
What Types of Waterproofing Membranes Are Best for Flat Roof Decks?
Selecting a membrane depends on finish choice and foot traffic: EPDM and PVC sheet membranes perform well under pavers when combined with proper pedestals and protection boards, while liquid-applied membranes excel in complex or irregular details where seamless coverage matters. PVC offers weldable seams that resist leaks and UV exposure, making it a strong long-term option for exposed decks, though initial costs are higher. Liquid systems are cost-effective for intricate junctions but require careful protection if used beneath pavers or heavy planters. Installation quality, drainage detailing, and integration with railings and penetrations determine performance far more than membrane brand alone.
Choosing the right system is a designer-and-engineer decision that should occur after structural plans are set, because membrane type affects load and finish choices and dictates protective layers required for pavers or heavy planters.
How Does Proper Waterproofing Prevent Costly Repairs and Extend Deck Life?
Proper waterproofing prevents chronic leaks that cause rot, insulation damage, and interior finishes deterioration, and it significantly lowers the probability of expensive emergency repairs or premature membrane replacements. A correctly detailed membrane with continuous flashings and reliable drainage ensures that water is shed away from critical junctions instead of accumulating at vulnerable seams or penetrations. Over the roof-deck lifecycle, investing in durable membranes and protective layers under pavers often reduces total cost of ownership by avoiding repeated patching and interior remediation. In practice, the cost differential between quality installation and cheap, short-lived solutions is recouped through fewer repair events and higher resale appeal.
Given these lifecycle benefits, many homeowners prefer contractors who manage material sourcing and installation quality to protect warranty coverage and long-term performance.
How Can Design Choices and Materials Influence Rooftop Deck Costs and Home Value?
Design choices — material selection, amenity additions, and structural finishes — directly influence project cost and the deck’s contribution to home value. Materials vary widely in upfront cost, maintenance demand, and structural weight, which can increase reinforcement needs. Design features such as built-in seating, lighting, and outdoor kitchens improve usability and often offer higher perceived value to buyers, but they increase electrical, plumbing, and structural scopes. The table below compares common decking materials on durability, maintenance, cost per sq ft, and typical ROI considerations to help homeowners match design choices with budget and resale goals.
MaterialDurabilityMaintenanceApprox. Cost per sq ftWood (pressure-treated, cedar)ModerateAnnual sealing/inspection$15–$35Composite deckingHighLow maintenance$30–$80Pavers (stone/concrete)Very high (but heavy)Low, may need re-leveling$20–$70
What Are the Pros and Cons of Popular Decking Materials Like Wood, Composite, and Pavers?
Each decking material carries trade-offs in aesthetics, maintenance, and structural impact. Wood offers classic appearance and lower initial cost but requires staining and inspection to prevent rot in New England winters and spring thaws. Composite boards reduce maintenance and resist moisture but have higher upfront cost and may trap heat in direct sun. Pavers provide a high-end hardscape look, exceptional durability, and easy replacement of individual units, but their weight often necessitates more substantial structural reinforcement and careful drainage planning. Homeowners should weigh life-cycle costs and required structural upgrades when selecting materials.
These material pros and cons inform which design features make sense for maximizing value, from safety elements to functional amenities.
Which Design Features Maximize Return on Investment and Enhance Outdoor Living?
High-ROI design features prioritize safety, usability, and low-maintenance finishes that appeal to buyers and improve everyday enjoyment. Code-compliant railings, integrated LED lighting, durable decking, and weather-resistant built-in seating enhance aesthetics and function without requiring frequent maintenance. Features like planters and modular shade structures add perceived value when they avoid heavy loads that trigger expensive reinforcements. Conversely, high-cost amenities such as full outdoor kitchens can deliver lifestyle benefits but offer mixed ROI depending on neighborhood expectations and added mechanical scopes.
Prioritizing safety and durable finishes typically yields the best balance between homeowner enjoyment and long-term value, which ties directly into the need for planned maintenance and professional oversight.
What Maintenance Practices Protect Your Rooftop Deck Investment Over Time?
Regular maintenance preserves waterproofing, prevents structural deterioration, and sustains aesthetic value in New England’s seasonal cycle. Essential practices include seasonal debris removal, inspection of drains and scuppers to ensure clear flow, checking flashings for gaps, and monitoring for ponding after storms or thaw cycles. Scheduled professional inspections can identify early signs of membrane distress or connection failures before they progress into costly interior water damage. Below is a homeowner-facing checklist of seasonal maintenance tasks that protect the deck and roof assembly.
Seasonal maintenance checklist introduction: follow these steps each spring and fall to reduce long-term repair risk.
Clear debris and sweep surfaces to prevent blocked drains and scuppers.
Inspect membranes and flashings for cracks, blisters, or seam separation.
Verify drain and scupper function and correct any ponding or low spots.
Check railings, fasteners, and visible framing for corrosion or movement.
Remove sensitive planters during winter or use pedestals that allow drainage.
Regular maintenance reduces cumulative wear and supports warranty compliance, and homeowners who spot red flags early dramatically lower lifecycle repair costs.
What Seasonal Cleaning and Inspection Steps Are Recommended for New England Roof Decks?
Seasonal checks should focus on preventing moisture retention and identifying damage caused by freeze-thaw cycles typical of Massachusetts. In spring, clear accumulated winter debris, inspect for membrane punctures or seam separation, and confirm that drainage routes are free of leaves and grit. In fall, secure loose items, clean drains, and examine guardrails and fasteners for corrosion before winter storms. For DIY tasks, document findings with photos to support later professional assessments; for any signs of membrane distress or structural movement, schedule a professional inspection promptly.
Timely seasonal care prevents small issues from escalating — and when it’s time for deeper evaluation, a contractor can perform the next steps described below.
When Should Homeowners Seek Professional Maintenance Services?
Homeowners should call professionals when they observe persistent ponding, interior stains after storms, sagging deck surfaces, or visible membrane failure; these are red flags indicating potential structural compromise or waterproofing failure. Annual professional inspections are advisable for rooftop decks, especially those with pavers, heavy planters, or integrated amenities, because professionals evaluate hidden connections and membrane performance that DIY checks cannot. Contractors typically inspect membrane continuity, flashing integrity, load-bearing connections, and drainage effectiveness, then recommend corrective actions that may include localized repairs or preventive upgrades.
For homeowners in the South Shore region seeking coordinated maintenance, inspection, or repair services, AHB Construction LLC offers local expertise, manages material sourcing and necessary permits, and provides free consultations to scope required work and estimate costs. Engaging a licensed, insured local contractor helps preserve warranties and ensures repairs meet code and performance expectations.
